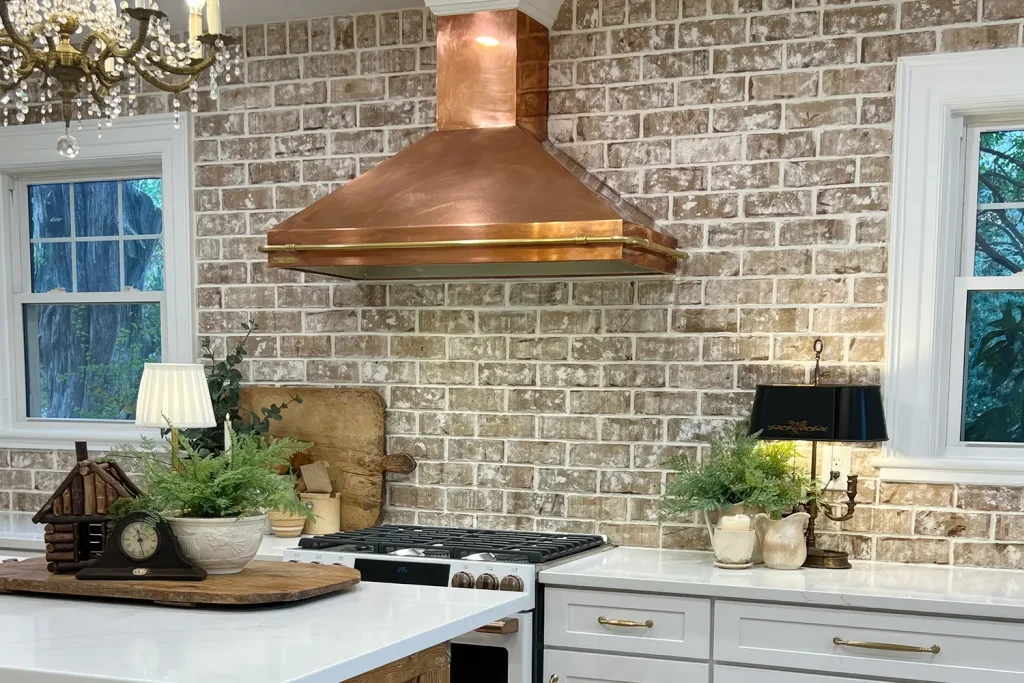
A social media influencer and DIY homeowner turned back the clock on her 1990s kitchen in a 1920s house…going from “new,” back to “old” again, courtesy of Pine Hall Brick Company’s Oyster Pearl Oversize ThinClad brick. All photos and video courtesy of Deborah Ysidron, The Blended Nest
Sometimes, change is a good thing.
For Deborah Ysidron and her 1928 Dutch Colonial, change is a continuous thing.
Ysidron is a social media influencer who does DIY projects under the name, The Blended Nest. She chose that to depict the idea of a home for a blended family, like hers.
Her kitchen came with the standard flooring, counter, and wall cabinets. It was all painted up to look like a version of Today’s Kitchen…so long as today was 1994.
But to Ysidron, that wasn’t what the kitchen should necessarily look like in a 1928 home.
“When we bought it, it had been absolutely stripped of character,” said Ysidron.
Watch Deborah Ysidron’s DIY kitchen makeover, step by step, in eight minutes
So she decided that she could do better. A trip to the Greensboro Pine Hall Brick Company patio store and a big-box retailer followed. She came home with Oyster Pearl Oversize ThinClad brick, some adhesive compound, a trowel, and a tile saw.
She has already tiled a bathroom floor. That skillset transfers from the horizontal on the floor to the vertical up the wall.
But she still had questions. The first, being the most important: Where do you start?
“My brain is weird,” Ysidron says. “I need to think everything through before I start something.”

If I may say so, it turned out absolutely perfect for our style. I went around each brick with a gloved hand to make the joints look old. Nothing is perfect and that’s exactly how I wanted it to look. I hope you love it as much as we do!
If you’re considering a DIY kitchen makeover…
Ysidron reviewed YouTube videos and talked it over with Brian Light at the Brick Industry Association, from where she learned that in this particular installation, she should strike a line at the center of the stove and then work her way out on both sides.
To visualize how it would all look, Ysidron cleared everything off her counter. Then she laid out the bricks on the countertop in the pattern she wanted This was the deciding factor as to whether she would have a brick – or a joint between bricks – in the exact center line on the stove
Starting at the stove and working her way out. Ysidron troweled on the adhesive and put the bricks in place in a running bond pattern. She stopped frequently to check for level and occasionally cut a brick for fit. The adhesive was more forgiving and much easier to work with on the ThinClad brick than the thin-set mortar had been for her tile floor project. It didn’t dry as quickly and gave more time to work the brick into place.
Once the wall was within about a half-a-brick of the ceiling – and with a level line all the way across – Ysidron began cutting bricks in half to run a soldier course perpendicular to the running bond pattern that she used for the field of bricks. That was to avoid having to cut a brick horizontally, which would have been difficult, at best.
Finally, Ysidron used a bag similar to a pastry bag to squeeze grout in between the bricks.

Going for character more than perfection
“I really want to pull the grout into the brick, because I want it to look old and not perfect,” she said. “I want it to look like it has been there for years and years.”
True to form for any DIY project, she ran out of brick at one point and had to go and get more.
Ysidron confirmed: tiling a vertical wall behind a countertop is much easier on the knees than tiling a bathroom floor.
Next up? Putting in trim to improve the looks of the chair rail and putting up a pergola above the garage door. And she’s staying on the lookout for old elements for the house, like the kitchen island from a barn and a 1930s brass chandelier. Of course, there will be paint to put on, and wallpaper to take off, and furniture to refinish, and laminate flooring to install.
Through it all, Ysidron will likely learn the motto of the committed DIYer: It’s always something.

